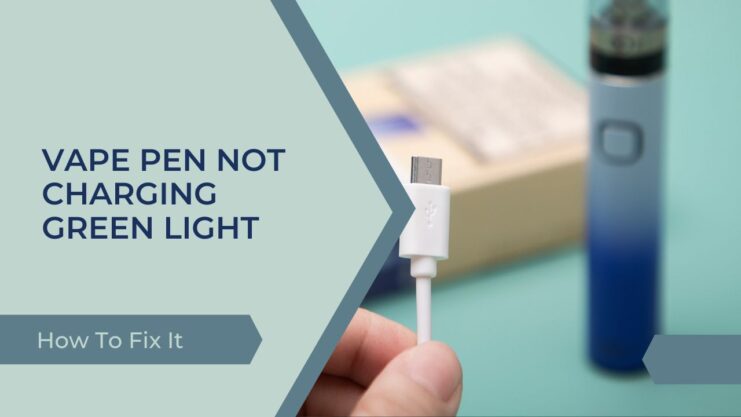
Vape pens have become an increasingly popular alternative to traditional smoking in recent years. With their sleek design and convenient portability, these devices offer a modern solution for those looking to enjoy a smoke-free lifestyle. However, as with any electronic device, they can sometimes experience issues. One common problem users encounter is a vape pen that won’t charge or displays a green light while charging.
If you’ve found yourself in this predicament, don’t fret! This blog post will guide you through various steps to troubleshoot and fix this problem. We’ve done extensive research to provide you with valuable insights and solutions to get your vape pen back in working order. So, let’s dive in!
All the Components Explained
Anatomy of a Vape Pen
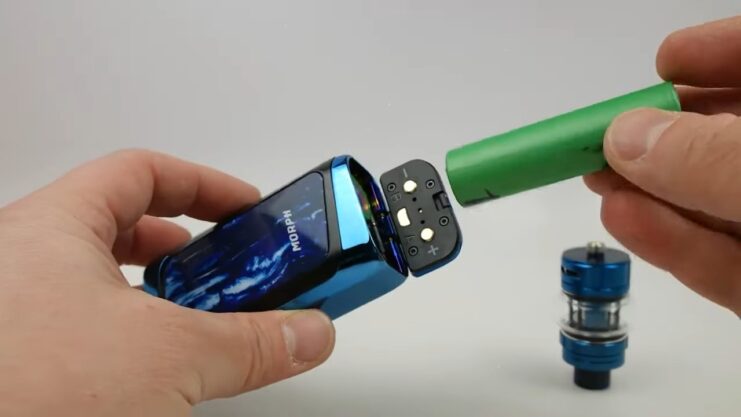
To begin troubleshooting, it’s essential to familiarize yourself with the various components of your vape pen. A standard one typically consists of the following parts:
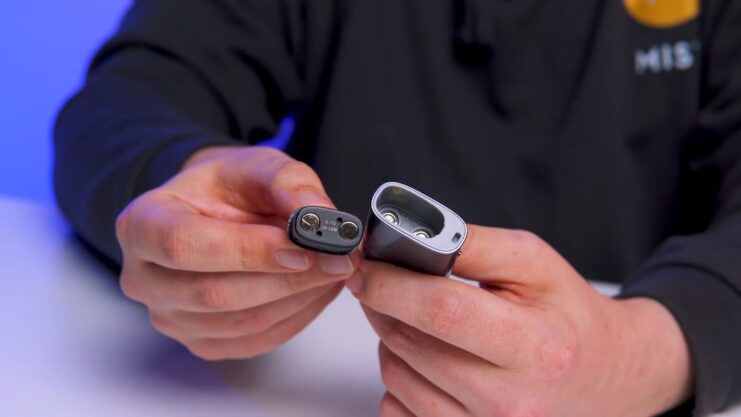
- Battery: The power source for your vape pen is rechargeable via a USB cable.
- Atomizer: The heating element responsible for vaporizing the e-liquid.
- Tank: A refillable container that holds the e-liquid.
- Mouthpiece: The part through which you inhale the vapor.
- Charger: A USB cable or wall adapter is used to recharge the battery.
The Charging Process and Indicators

When charging your vape pen, the device will usually display a specific light color to indicate its charging status. Common colors include:
- Red: The battery is charging.
- Green: The battery is fully charged.
- Blinking: The battery is experiencing a connection issue or is not charging.
Keep in mind that these colors may vary depending on the manufacturer or model of your vape pen. It’s crucial to consult your device’s user manual to understand the correct charging process and color indicators for your specific vape pen.
Troubleshooting and Fixing the Charging Issues
Basic Troubleshooting Steps
Before delving into more complex solutions, try these basic troubleshooting steps to resolve the issue of a vape pen not charging or displaying a green light while charging:
- Check the USB cable and wall adapter: Ensure that your charging cable and wall adapter are functioning correctly. Try using a different cable or adapter to see if the issue persists.
- Inspect the charging port: Look for any debris or damage within the charging port of your vape pen. Use a small brush or toothpick to gently clean the port if necessary.
- Confirm battery connection: Make sure the battery is correctly connected to the atomizer. Unscrew and reattach the battery, ensuring a snug fit.
- The charge for the recommended time: Some vape pens require an extended charging period, especially for the initial charge. Consult your user manual and charge your device for the suggested time.
Identifying and Fixing the Issue
If the basic troubleshooting steps don’t resolve the problem, consider the following possible causes and solutions:
Cause 1: Faulty Battery
Solution: If your vape pen’s battery is damaged or has reached the end of its life cycle, it may fail to charge or display a green light while charging. In this case, you’ll need to replace the battery. Purchase a new battery from a reputable retailer, ensuring compatibility with your specific vape pen model.
Cause 2: Damaged or Dirty Charging Port
Solution: As mentioned earlier, debris or damage within the charging port can hinder proper charging. If cleaning the port doesn’t resolve the issue, it’s possible that the charging port itself is damaged. In this case, you may need to visit a vape shop or contact the manufacturer for repair or replacement of the damaged part.
Cause 3: Firmware or Software Issues
Solution: Occasionally, software or firmware issues can cause your vape pen to malfunction during the charging process. To fix this, you may need to update your device’s firmware or perform a factory reset. Consult your user manual for instructions on how to perform these actions. Remember to back up any important data or settings before proceeding, as a factory reset will erase all stored information.
Cause 4: Faulty Charger or Charging Cable
Solution: If you’ve determined that the issue lies with the charger or charging cable, it’s time to replace these components. Purchase a new charger and cable from a reputable source, ensuring compatibility with your specific vape pen model. Always use the recommended charger and cable to avoid potential damage to your device.
Cause 5: Internal Circuitry Issues
Solution: If none of the above solutions resolve your vape pen’s charging issue, it’s possible that there’s a problem with the internal circuitry. In this case, professional repair or replacement of the device may be necessary. Contact the manufacturer or visit a vape shop for further assistance.
Preventing Future Charging Issues
To minimize the risk of future charging problems with your vape pen, consider these maintenance tips:
Regular Cleaning and Maintenance
Keep your vape pen in optimal condition by performing regular cleaning and maintenance. This includes:
- Cleaning the charging port: Use a small brush or toothpick to gently remove debris from the port.
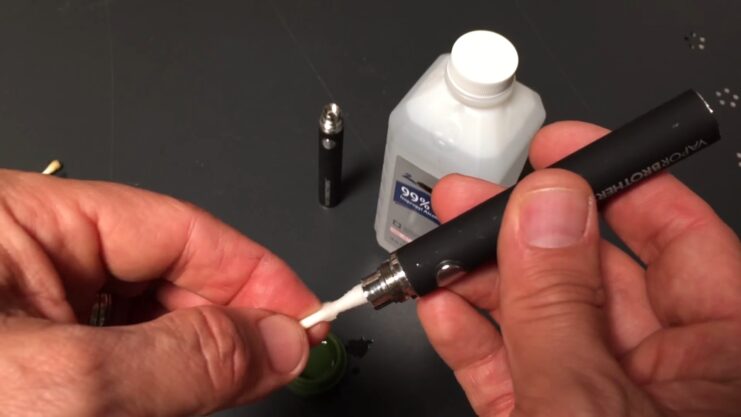
- Wiping down the battery and atomizer contacts: Use a cotton swab dipped in isopropyl alcohol to clean the contacts, ensuring proper connection.
- Inspecting and replacing parts as needed: Regularly check your vape pen for signs of wear or damage, and replace components as necessary.
Safe Charging Practices
To protect your vape pen’s battery life and prevent potential charging issues, follow these safe charging practices:
- Charge using the manufacturer-recommended charger and cable.
- Avoid overcharging: Unplug your vape pen once it reaches a full charge.
- Don’t use it while it’s charging.
- Keep it away from extreme temperatures during charging.
Proper Storage
Store your vape pen in a cool, dry place away from direct sunlight or heat sources. This will help preserve the life of your device and prevent potential charging issues. Additionally, store your vape pen and its components separately when not in use to avoid accidental damage.
Final Words
A vape pen that won’t charge or displays a green light while charging can be frustrating, but with the right troubleshooting steps and solutions, you can quickly resolve the issue and get back to enjoying your smoke-free lifestyle. By understanding the various components of your vape pen, following basic troubleshooting steps, and implementing the appropriate fixes, you can confidently tackle this common problem.
Additionally, practicing regular maintenance, using safe charging practices, and properly storing your vape pen will help prevent future charging issues and prolong the life of your device. With this comprehensive guide in hand, you’re well-equipped to face any vape pen charging challenges that come your way.